Voter Tutorial
This page is still under construction and will be updated soon. The screenshots displayed are from Penpot and may differ from the actual votura web app.
You have received an invitation to participate at a voting event? Here is a short tutorial on how you can submit your vote on votura.
Step 0: Log in using your voter token
This step is only necessary if you have received a voter token to participate in an election. If you get redirected to votura from another platform (e.g. a university portal), you most likely already have logged in there and your voter token was added to your browser automatically.
If you have received a voter token, you can log in using the following steps:
- Go to the votura instance set up by the organization hosting the election. You should have received a link to this instance.
- Click "I want to vote..." on the homepage.
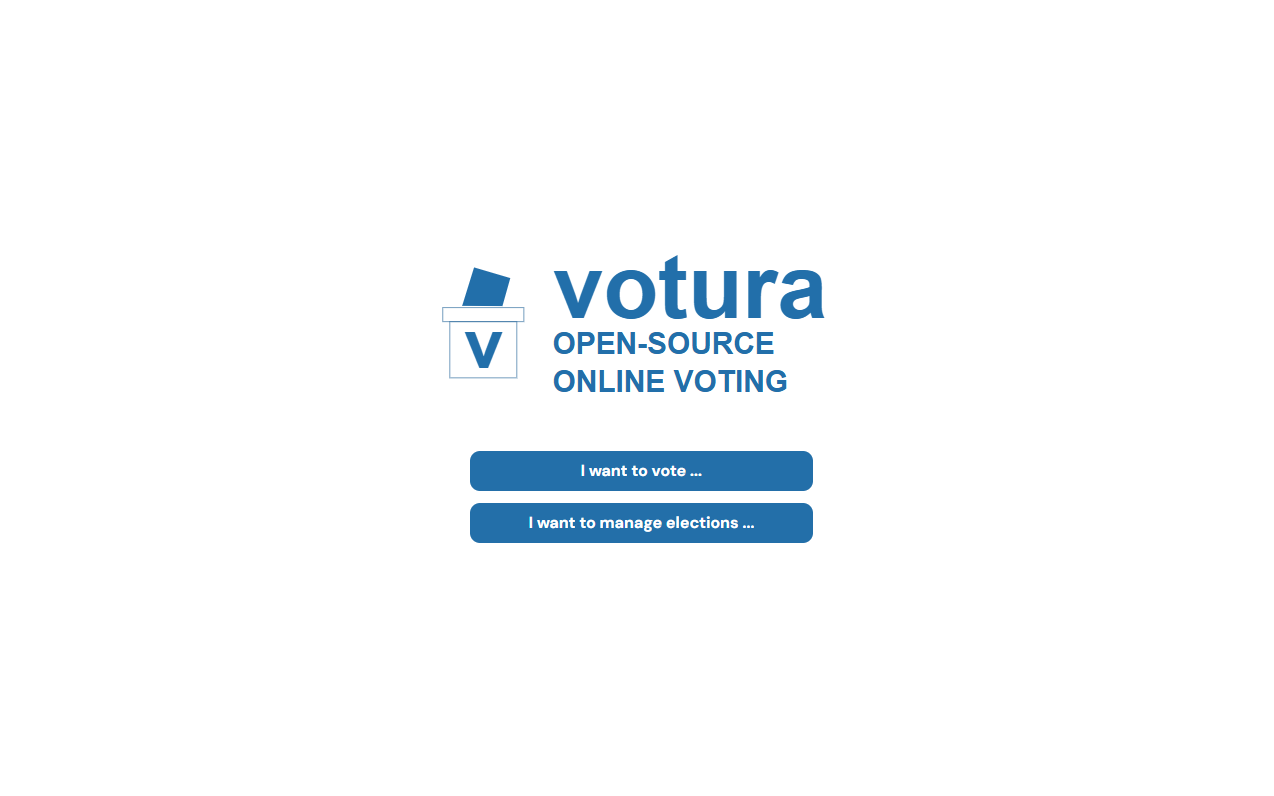
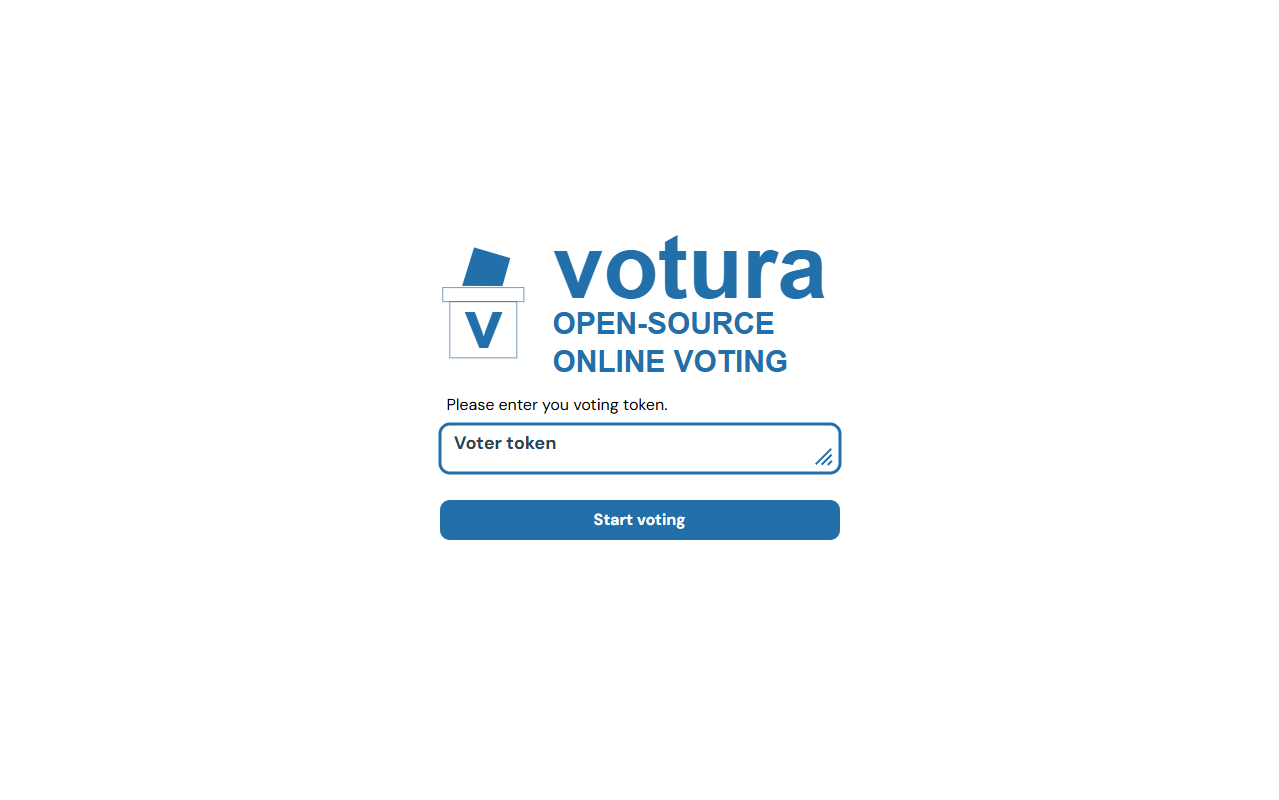
- Paste your voter token into the input field and click "Start voting".
Step 1: Pick an election to vote in
After logging in, you will be presented with a welcome page where it is explained to you how to use votura as a voter.
You can click on the Overview button to see a list of elections you can vote in.
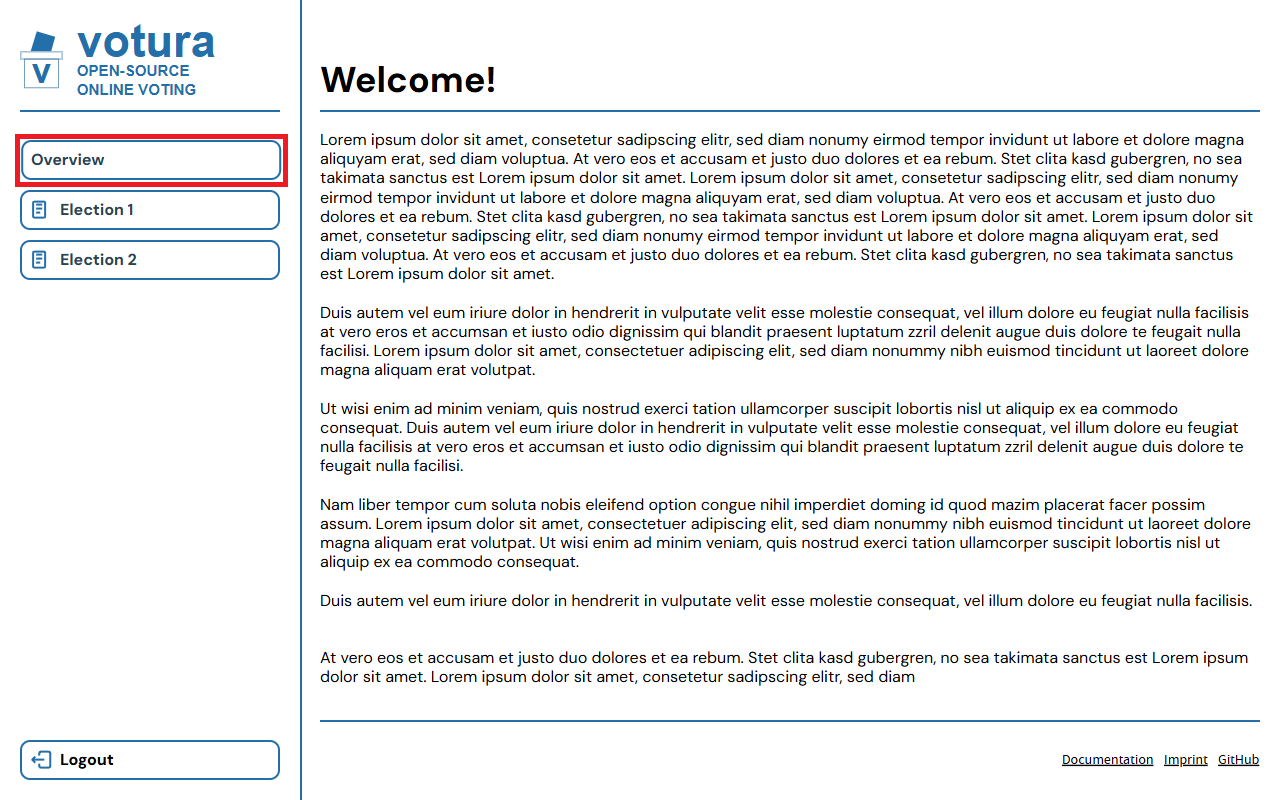
Alternatively you can click on any of the elections shown below the Overview button to go directly to the corresponding election.
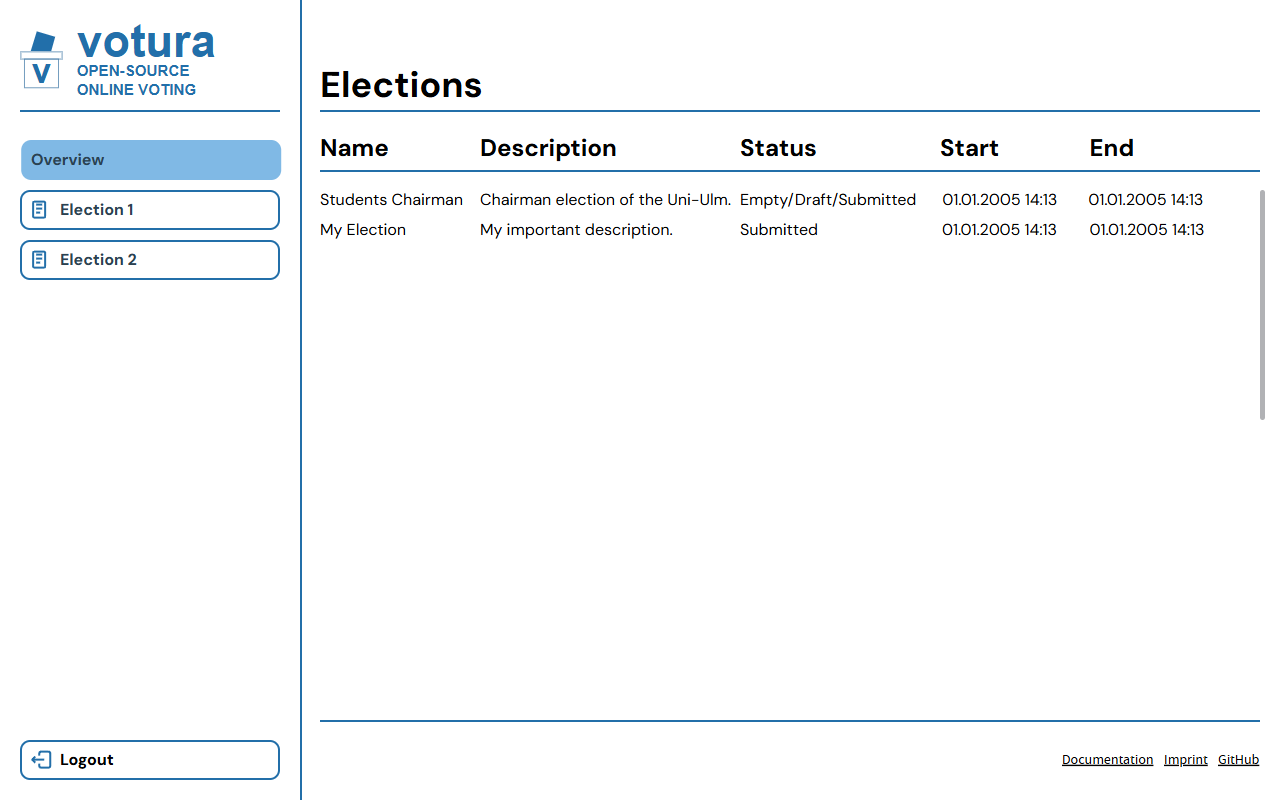
After clicking the Overview button, you will see a list of elections that are still in progress and that you can vote in.
Each election has a name and description, as well as a start and end date of the election.
The status of elections is also shown, which can be one of the following:
- Empty: You have not begun voting in this election yet and can still cast your vote.
- Draft: You have started voting in this election but have not submitted your vote yet. You can continue voting in this election.
- Submitted: You have submitted your vote in this election. You can no longer change your vote.
Step 2: Cast your vote
To cast your vote, click on one of the elections in the election list or under the Overview button to the left.
This will take you to the ballot paper of the election, where you can also see the description of the election, if the election is private and if invalid votes are allowed.
If the election is private, this means that even the election administrator cannot trace your vote back to you without changing the code of votura.
If the vote is not private, the election administrator can see which voter token has cast which vote.
This can make sense in some scenarios, e.g. when deciding on a date for a meeting, where it is important to know who voted for which date.
If invalid votes are allowed, you can choose to submit an empty ballot paper or a ballot paper that does not follow the rules of the election.
This enables you to express protest or dissatisfaction with the election or the candidates.
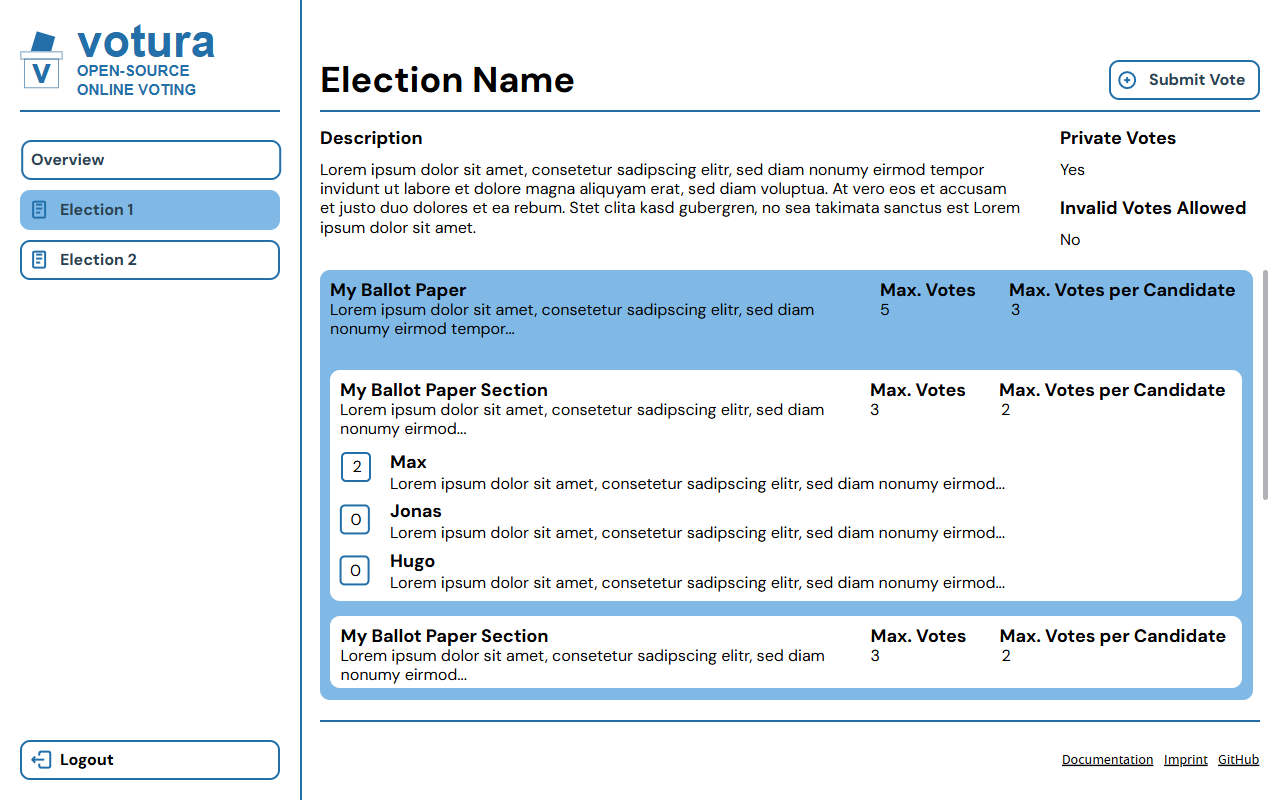
As displayed in the above screenshot, the ballot paper has a maximum number of votes you can cast, as well as a maximum number of votes you can cast for each candidate. In this example, you can cast a maximum of 5 votes in total and a maximum of 3 votes for each candidate. This is applicable to all ballot paper sections in the election, meaning that you can cast a total of 5 votes across all sections and a maximum of 3 votes for each candidate across all sections.
A ballot paper is divided into one or more sections, each of which can have different rules. In this example, there are two sections, both with the same title and same rules. They both allow a maximum of 3 votes in total and a maximum of 2 votes for each candidate. You could for example cast up to 2 votes for "Max" in the first section and another vote for "Max" in the second section, resulting in a total of 3 votes for "Max".
After filling out the ballot paper to your satisfaction, you can submit your vote by clicking the Submit Vote button at the top right of the page.
If your vote is invalid, a warning will be shown and you can either go back to the ballot paper to change your vote or submit your invalid vote anyway, if invalid votes are allowed in the election.
Step 3: [Optional] Audit your vote
After submitting your vote, you will be taken to a page, where you can audit the votura web app to ensure that your vote was encrypted correctly. This part of the voting process is optional, but it is recommended to do so to ensure that your vote was cast as intended.
This part of the voting process is still under development and no design of the audit page is available yet. Auditing can be done by using your own tool or by using the tool provided by votura. See Issues #348 - #350 for more information.
Step 4: [Optional] Download your ciphertexts
After the optional audit or directly after submitting your vote, you can download the ciphertexts of your vote.
This is also optional, but it is recommended to do so, so that you can verify that your vote was included in the tallying process later on.
You can download your ciphertexts by clicking the Download ciphertext... button on the page shown.
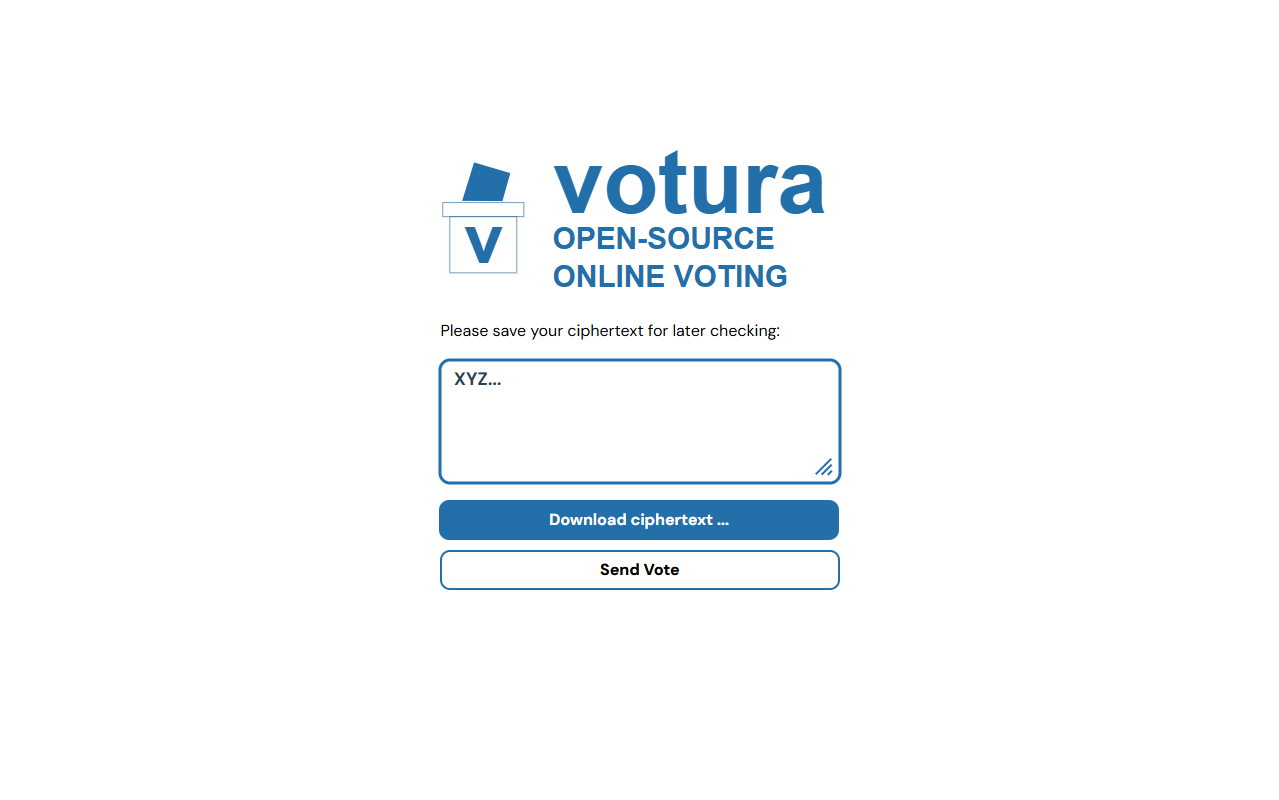
Step 5: Send your vote
On the same page where you can download your ciphertexts, you can also send your vote to the votura server by clicking the Send Vote button.
This step is the final of submitting your vote and needs to be done so that the votura server can include your vote in the tallying process.
After clicking the Send Vote button, you will be taken to a confirmation page, where you can see that your vote was sent successfully.
You can get back to the election list by clicking the Back button.

Step 6: [Optional] Verify the vote tallying process
After the election has ended, the election administrator will tally the votes and publish the results of the election. You can verify that your vote was included in the tallying process by using the ciphertexts you downloaded in Step 4.
This part of the voting process is still under development and no design of the tally verification page is available yet.